Monday 30 January 2012

A Pingu Penguin

I found this amazing Blog called Purl Bee.

There are some fabulous projects there, from sewing to knitting, with great tutorials and this is where I got the inspiration, free template and creative tickle, to make Luca (for a change) a

Penguin


It's my first attempt, a bit fiddly, but none the less rewarding.
I think Pingu (my nickname), needs a few friends through...


On the blog, they made various ones using monochrome black and white material (which looks great), but as I had some leftover scraps of material in my fabric drawer, I though I'd be a bit unconventional and make a  blue Penguin.
They exist, right?


Brrrrrrrrrrrrrrrr...illiant!


Thursday 26 January 2012

A little Rag Doll party

Back in the rhythm of things...
At home.
Juggling time. Like little pockets. One hour here to do laundry, 30 minutes there to dye/wash hair (yes, the grey hair is fast becoming the most prominent colour on my head), another 30 minutes to clean the kitchen whilst making phone calls on my hands free phone... all this whilst you have your first nap of the day.
Phew!

So, back to some crafting... as it makes me happy :-)

I have always wanted to make a

RAG DOLL


and finally I found a patter online on Martha Stewart's website
and they are so easy and fun to make that I have just made 3 of them.
A blond, a raven haired and a redhead (still in the making).

I will wait until you are older, so you can name them.

On the Martha Stewart website, you get a free, downloadable template and a step by step tutorial, so check it out.
Fabulous. Cute and quirky.


I love embroidering the different faces on the dolls (on the second doll, I did this before sewing the pieces together... and it looks a lot better, no straggly threads showing).


I made the apron and bows as afterthoughts... more such accessories to come soon.
A girl neeeeeeeeeeeds accessories!


I am sure I could try out adding "long hair" to the next doll I make (I am addicted now), just to see if it works.
The pattern is only for "short haired dolls".

Also... I added some new fringe styles, which I made myself. Easy, use the template as a starting point, then cut your own "hairstyle".


And now... I think a dolls house is in order.

Ohhhhh I can just see the hours of fun I have ahead of me... playing!
That's if you are into dolls, of course. I remember when I was little, I wasn't really a "doll" girl, more Playmobil and Marbles, but hey... I can but hope.

Wednesday 25 January 2012

Solothurn

Once again...
I find myself in Switzerland, with you by my side, as I present JUMP at another Film Festival.


Nervous as always, not so much for the films' sake, but how I will juggle the "mommy" thing with the "director" thing.
I come prepared with sling, pram, expressed milk, formula (just in case)... ready to brave the screening tomorrow at 5pm.

It's never easy knowing how it will be perceived bringing you along, as my side kick, in these events. Like "bring your kid to work". Not always the best image, but I am determined that being a woman and a mummy shouldn't limit ones professional dreams. Let people think what they like, I say!
Hopefully, as it's 2012, people will accept that you are only 4 months old, and I am once again a new mum in the throws of motherhood, whilst grappling with the duties of what making a film has bestowed upon me.

We have left Luca and Alex at home (as Luca has school), with a promise that next time I have to get on a flight, they will come along too... I miss them dearly and I know you do too.


xxxx

PS. The screening went well... the film looked great on the MASSIVE screen, great quality and sound.
Very happy about it.
Thank you Solothurn

PPS. Nina, you were amazing!!! Definitely won the Oscar for most fabulously calm and sweet baby. Never cried. Never complained. Just went along for the ride amidst the chaos and hubbub of film people.

PPPS. Coudn't have done it without my great friend Sarah. Once again, she was there offering help and support every step of the way. :-)

Tuesday 10 January 2012

A Trifle late...

My gosh... it's been ten days since I have written anything.
The start of the year, post the xmas madness, has been rather full on and emotional...

You (Nina - I am now writing this blog to you), have refused to eat from (without sounding too crass so early in the morning) my "mummy milk bottles" :-)
This has spun me totally out, as you are only 4 months old, and remembering back... with Luca I pushed on until he was 11 months old.
It's been hard work, painful (both emotionally and earlier on physically), that I have seriously pondered getting started on the bottle and save everyone the pain of tears, tantrums and frustration.
I've felt so sad to think that perhaps this is it.

Then, magically, yesterday, I decided to start you on a more consistent routine (I love a good schedule), feeding you every 4 hours, rather than every 2 and... voila', as if by magic, you decided it was boob time again!!!
Now, I know I shouldn't really be surprised.
I fell into the parenting faux pas of thinking
"this is how it's always going to be"
when suddenly it all changes!
How can things change so quickly.
Surely you should stay a tiny baby for EVER and EVER requiring the same things, for EVER and EVER (or at least until I change my mind?)

 Ahhhh... "keep up Mum, keep up" I hear you say.

So...
As I'm a Trifle late in keeping up with you little Nina, my mind wonders over to puddings.
Namely, appropriately, the bestest, ever, pudding I have learnt to make.
 
Trifle
 

I made this at Christmas, after having sampled my mum-in-laws' famous trifle, and learnt to make my own (as her recipe is a safely guarded secret).

There are a million different ways of making Trifle, with different flavours and variations, but the key is, they all have layers of various flavours and textures.
If, like me, you can get yourself a glass dish, which can show off these layers, then it can look beautiful as well as taste delicious... otherwise, it's also yummy scrummy in a deep ceramic dish, just without the visual WOW factor.


Here is how I made this Raspberry/Strawberry, very boozy version.


Ingredients
No measurements, just experiment and try it out

Sponge (Pavesi) Biscuits or Trifle Biscuits
Brandy
Custard (either ready made or you can make your own if you are brilliant)
Almonds
Raspberries (tinned or fresh)
Sugar
Double Cream (to whip up)
Fresh fruit (Strawberries, Raspberries, or any other fruit you like)


Layer 1
First, make a tight layer of biscuits at the bottom of your dish and splash them with brandy, quite generously. 

Layer 2
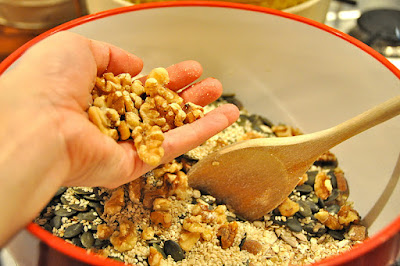
In a food processor, chop up the almonds with the tinned (fresh) raspberries, add sugar to your liking, if you have a sweet tooth) and a little more brandy.
Put this crunchy, sweet layer on top of the biscuits.

Layer 3
Make up your custard, until it's thick and creamy.
Pour the custard on top of your almond layer.

Layer 4
Chop the strawberries and or other fresh fruit and layer the fruit on top of the (now cooled) custard.

Layer 5
Whip up the double cream and layer this on top of the fresh fruit.

Finally
Decorate the top of the whipping cream with more strawberries or fruit.


Voila!

Sunday 1 January 2012

Healthy New Year

Happy New Year to you all...

On this first day of the first month of 2012 (raining as if it were monsoon), I am thinking about the chat my hubby and I had last night: new years' resolutions and all.

Alex is cutting out sugary things for the month of January and then no alcohol for the month of February (that I would like to see :-), and I would like to eat a little healthier after the Xmas binge of meats, sweets, cakes, crisps, pate', bacon, cheese and more...

So, I came across the wonderful blog that is My New Roots.
The best healthy, wholesome, yummy eating blog I have ever read. 
Wonderful recipes.
Gorgeous images.
One feels healthy just reading it!

So I have attempted to make my own homemade

Granola


It's turned out deliciously, fantastically yummy and healthy, 
plus I know exactly what's in it - and it's so scrummy.

This is how I made it, but actually, you can "build" your Granola any way you like, adding or taking away ingredients as you please.

First, preheat the oven to 175 degrees C.

Then... get the following ingredients:

7 Cups of Rolled Oats
1 Cup of Almonds (crushed)
1 Cup of Walnuts (crushed)
1 Cup of Sunflower Seeds
1 Cup of Sesame Seeds and Linseeds (mixed together)
1 Cup of Pumpkin Seeds
1 Cup of Pecan Nuts (crushed
1 Cup of Coconut
1 Tablespoon of Sea Salt
1 Tablespoon of Cinnamon powder


Mix all the above ingredients into a large bowl.

 
Then... get:

1 Cup of Sunflower Oil
1/2 Cup of Maple Syrup or Honey or Agave (you can add more if you want your Granola to be sweeter)

Heat up the Sunflower oil in a small pan with the Maple Syrup (Honey or Agave).
Once this has heated, pour the liquid into the bowl of ingredients.
Stir them together, until all the ingredients are coated in sunflower oil and maple syrup.

Put the mixed ingredients onto a baking trey lined with baking paper and stick it in the oven for aout 10 minutes (until the top layer turns golden brown).


Then move the granola around the trey a bit, so that the ingredients at the bottom of the trey are at the top and bake for another 5 minutes.
Repeat this process until all the granola is nicely roasted, golden brown and smells yummy.


(After roasting)
You can add
1 Cup of Raisins or Sultanas
1 Cup of Chopped Dates, Dried Apples, Dried Apricots, Banana Chips 
or any other dried fruit you like.


That's it!
I made kilos of the stuff, stored in a large jar, ready for morning breakfast or afternoon snacks.

Enjoy a healthy step in the right direction.